Hello Dear Amigurumi Followers
We add a new one to the free amigurumi patterns we have created for you. You can always get the most popular amigurumi patterns and the most preferred amigurumi crochet patterns on our site for free. Main crochets, amigurumi gazelles, amigurumi bears, amigurumi polar bears, amigurumi pandas, amigurumi penguins, amigurumi giraffes, amigurumi llama, amigurumi pigs, amigurumi rabbit, amigurumi clowns, amigurumi baby lambs, amigurumi lambs, amigurumi bees, amigurumi lambs dinosaurs, amigurumi elephants, amigurumi hippos, amigurumi monkeys, amigurumi cats, amigurumi dogs and more…
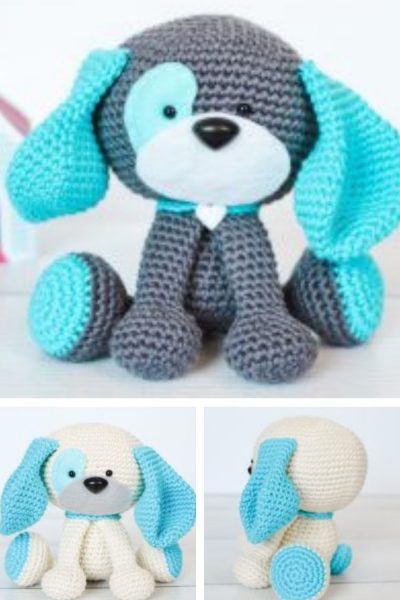
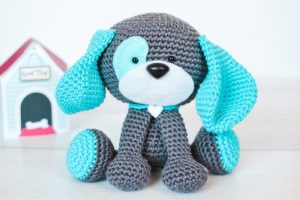
Our new free amigurumi crochet pattern Dog.
Here is our pattern;
Supplies
- Worsted Weight Yarn
- Lily Sugar ‘N Cream Yarn in Grey (~136 yards used)
- Lily Sugar ‘N Cream Yarn in Hot Blue/Strawberry Fraise (~70 yards used)
- Lily Sugar ‘N Cream Yarn in Ecru (~30 yards used)
- I also used I Love Cotton by Hobby Lobby in my video tutorial
- E/4 (3.50mm) crochet hook
- Two 6mm plastic safety eyes (Not recommended for children under 3 years old)
- 21mm or 24mm safety nose
- Felt or Fabric For Eye Patch And Muzzle
- Polyfil or stuffing of your choice
- Yarn/Darning needle
- Embroidery floss
- Embroidery needle
- Scissors
- Fabric glue
- Locking Stitch Markers (optional)
Techniques
- Magic Circle
- Single Crochet
- Single Crochet Increase
- Single Crochet Decrease (I like to use an invisible decrease)
- Slipknot And Chain
- Fastening Off
- Attaching Parts
- Changing Colors
Abbreviations
- sc – single crochet
- st/sts – stitch(es)
- inc – increase (add 2 stitches into a stitch)
- dec – decrease (join 2 stitches into 1)
- R1- round 1
- ( ) – repeat this group of stitches
The Dog Pattern Example
If a line is written with a single “inc”, “dec” or “sc” with nothing after it – make one increase, decrease, or single crochet into one stitch only.
6 sc into a Magic Circle {6 sts}
R1 starts with 6 single crochet in a magic circle
Alternate way to begin: chain 2, sc 6 times in 2nd chain from hook {6 sts}
(inc, sc) 6 times {18 sts}
(2 single crochets into a stitch, then single crochet in next stitch) – repeat that sequence a total of 6 times for a total of 18 stitches
(dec, sc in next 2 sts) 6 times {18 sts}
(join 2 single crochets into 1, and then single crochet in next 2 stitches) – repeat that sequence a total of 6 times for a total of 18 stitches.
EYE/MUZZLE PIECES
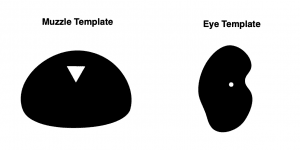
- Cut out the muzzle shape onto felt or fleece material.
- Make a small slit at the white triangle and place the safety nose. DO NOT secure the back of the nose. Set the nose aside.
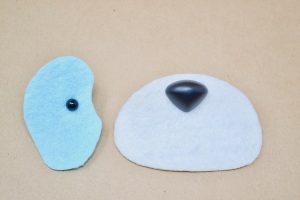
- Next, cut out the eye shape onto felt or fleece material. Make a small slit at the white dot, and insert the 6mm safety eye. DO NOT secure the back of the eyes. Set the eyes aside.
HEAD
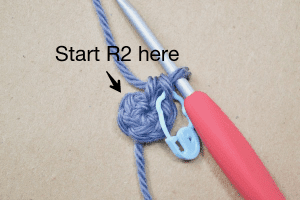
- R1: 6 sc into a magic circle {6 sts}
- R2: (inc) 6 times {12 sts}
- R3: (inc, sc) 6 times {18 sts}
- R4: (inc, sc in next 2 sts) 6 times {24 sts}
- R5: (inc, sc in next 3 sts) 6 times {30 sts}
- R6: (inc, sc in next 4 sts) 6 times {36 sts}
- R7: (inc, sc in next 5 sts) 6 times {42 sts}
- R8: (inc, sc in next 6 sts) 6 times {48 sts}
- R9: (inc, sc in next 7 sts) 6 times {54 sts}
- R10: (inc, sc in next 8 sts) 6 times {60 sts}
- R11: (inc, sc in next 9 sts) 6 times {66 sts}
- R12-17: sc in next 66 sts {66 sts}
- R18: (dec, sc in next 9 sts) 6 times {60 sts}
- R19: sc in next 60 sts {60 sts}
- R20: (dec, sc in next 8 sts) 6 times {54 sts}
- R21: sc in next 54 sts {54 sts}
- R22: (dec, sc in next 7 sts) 6 times {48 sts}
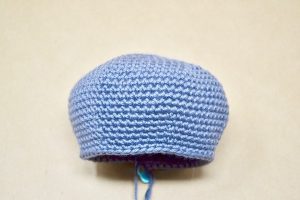
- R23: sc in next 48 sts {48 sts}
- Grab the prepared eye patch.

- Place the safety eyes between R15 and R16, leaving 5 stitches open between the eyes.The top of the fabric should hit around R11 or R12.
- Secure the back of the safety eyes.
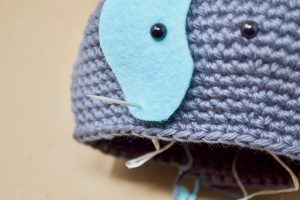
- Cut a long piece of embroidery floss (color of your choice) to sew on the eye patch.

- Double knot one end of the floss. Make a knot on the inside of the head and begin to sew around the eye patch.
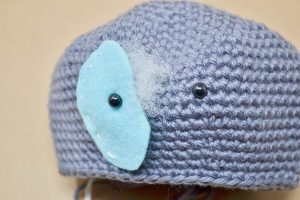
- Grab a small piece of stuffing and fill in some of the eye patch while stitching around the eye.(Don’t stuff the bottom part of the eye patch as much – the muzzle will be glued there)
- Continue to sew and stuff as you go.
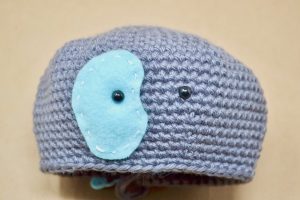
- When finished – make a knot on the inside of the head to secure the embroidery floss.
- Grab the prepared muzzle.
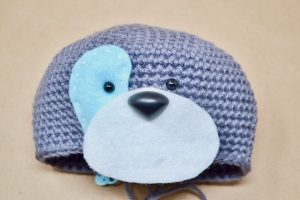
- Place the nose in the middle of the eyes between R17 and R18 and secure the safety nose.
- R24: (dec, sc in next 6 sts) 6 times {42 sts}
- Begin to stuff the head and continue as you crochet.
- R25: (dec, sc in next 5 sts) 6 times {36 sts}
- R26: (dec, sc in next 4 sts) 6 times {30 sts}
- R27: (dec, sc in next 3 sts) 6 times {24 sts}
- R28: (dec, sc in next 2 sts) 6 times {18 sts}
- R29: (dec, sc) 6 times (12 sts}
- R30: (dec) 6 times {6 sts}
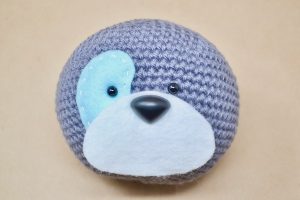
- Fasten off and leave a long piece of yarn to sew the head shut. Weave the rest of the yarn into the head.
- Don’t glue the muzzle until after assembly unless you’re able to let the muzzle dry overnight. Set the head aside.
EAR
- Make 2
- No stuffing needed.
- Using color blue
- R1: 5 sc into a magic circle {5 sts}Alternate way to begin: chain 2, sc 5 times in 2nd chain from hook {5 sts}
- R2: (inc) 5 times {10 sts}
- R3: (inc, sc) 5 times {15 sts}
- R4: (inc, sc in next 2 sts) 5 times {20 sts}
- R5: (inc, sc in next 3 sts) 5 times {25 sts}
- R6: (inc, sc in next 4 sts) 5 times {30 sts}
- R7: (inc, sc in next 5 sts) 5 times {35 sts}
- R8: (inc, sc in next 6 sts) 5 times {40 sts}
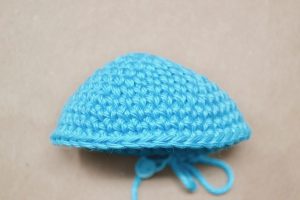
- R9-11: sc in next 40 sts {40 sts}
- R12: (dec, sc in next 6 sts) 5 times {35 sts}
- R13: (dec, sc in next 5 sts) 5 times {30 sts}
- R14: (dec, sc in next 4 sts) 5 times {25 sts}
- R15: (dec, sc in next 3 sts) 5 times {20 sts}
- R16: (dec, sc in next 2 sts) 5 times {15 sts}
- R17-22: sc in next 15 sts {15 sts}
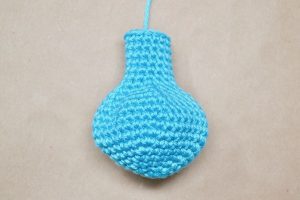
- Fasten off and leave a long tail.
- Flatten the ears and sew them shut.

- Set them aside until assembly.
BODY
- Using color grey
- R1: 6 sc into a magic circle {6 sts}Alternate way to begin: chain 2, sc 6 times in 2nd chain from hook {6 sts}
- R2: (inc) 6 times {12 sts}
- R3: (inc, sc) 6 times {18 sts}
- R4: (inc, sc in next 2 sts) 6 times {24 sts}
- R5: (inc, sc in next 3 sts) 6 times {30 sts}
- R6: (inc, sc in next 4 sts) 6 times {36 sts}
- R7-8: sc in next 36 sts {36 sts}
- R9: (dec, sc in next 4 sts) 6 times {30 sts}

- R10-12: sc in next 30 sts {30 sts}
- R13: (dec, sc in next 3 sts) 6 times {24 sts}
- R14-15: sc in next 24 sts {24 sts}
- R16: (dec, sc in next 2 sts) 6 times {18 sts}
- Fasten off and leave a long tail.
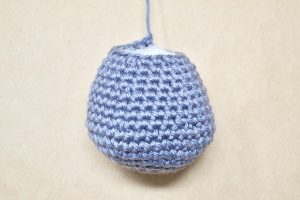
- Stuff the body.
- Set aside until assembly.
FRONT FOOT
- Make 2
- Using color grey
- R1: 5 sc into a magic circle {5 sts}Alternate way to begin: chain 2, sc 5 times in 2nd chain from hook {5 sts}
- R2: (inc) 5 times {10 sts}
- R3: (inc, sc) 5 times {15 sts}
- R4: (inc, sc in next 2 sts) 5 times {20 sts}
- R5-7: sc in next 20 sts {20 sts}
- R8: (dec, sc in next 2 sts) 5 times {15 sts}
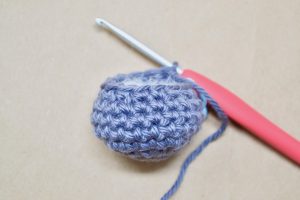
- Stuff the feet with a bit of stuffing. Do not stuff the legs.
- R9: (dec, sc) 5 times {10 sts}
- R10-20: sc in next 10 sts {10 sts}

- Fasten off and leave a long tail. Sew each foot shut and set aside for assembly.
BACK FOOT
- Using color blue
- R1: 6 sc into a magic circle {6 sts}Alternate way to begin: chain 2, sc 6 times in 2nd chain from hook {6 sts}
- R2: (inc) 6 times {12 sts}
- R3: (inc, sc) 6 times {18 sts}
- R4: (inc, sc in next 2 sts) 6 times {24 sts}
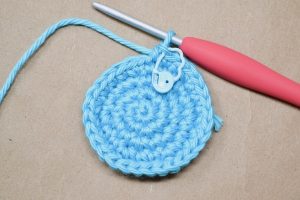
- R5: (inc, sc in next 3 sts) 6 times {30 sts}
- Change to Color grey
- R6-8: sc in next 30 sts {30 sts}
- R9: (dec, sc in next 3 sts) 6 times {24 sts}
- R10: (dec, sc in next 2 sts) 6 times {18 sts}
- R11: sc in next 18 sts {18 sts}
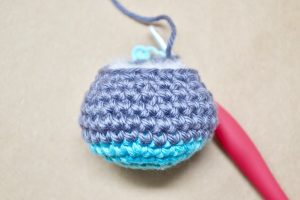
- Stuff the feet. Do not stuff the legs.
- R12: (dec, sc) 6 times {12 sts}
- R13-20: sc in next 12 sts {12 sts}

- Fasten off and leave a long tail. Sew each foot shut and set aside until assembly.
TAIL
- Using color blue
- R1: 6 sc into a magic circle {6 sts}Alternate way to begin: chain 2, sc 6 times in 2nd chain from hook {6 sts}
- R2: (inc) 6 times {12 sts}
- R3: (inc, sc) 6 times {18 sts}
- R4: sc in next 18 sts {18 sts}
- R5: (dec, sc) 6 times {12 sts}
- Fasten off and leave a long tail.
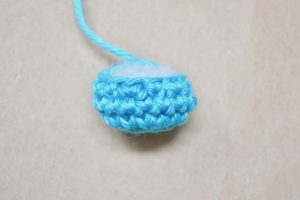
- Fill with a bit of stuffing.
ASSEMBLY
- I recommend pinning the parts together before sewing the animal together. This will give you a better idea of where you’d like the parts to be attached before actual assembly.
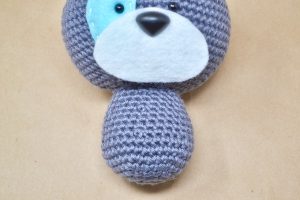
- Attach the body at the base of the head, around R26 and R27.
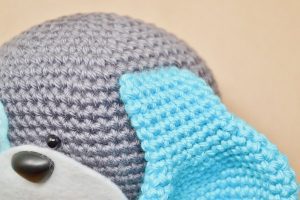
- Attach the ears between R10 and R11 on each side of the head.

- Attach the front legs next to each other underneath the head.
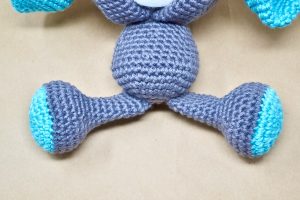
- Attach the back legs on a slant between R2 and R5.

- Attach the tail between R5 and R9 at the back of the body.
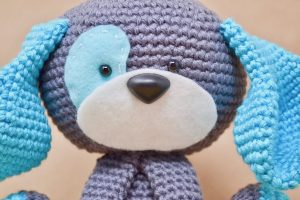
- Secure Muzzle: Using fabric glue, secure the muzzle in place. Hold it down with your hand for a few minutes, making sure it’s smooth. Let the muzzle dry for a few hours without manipulating the animal.
More Amigurumi Ideas;
