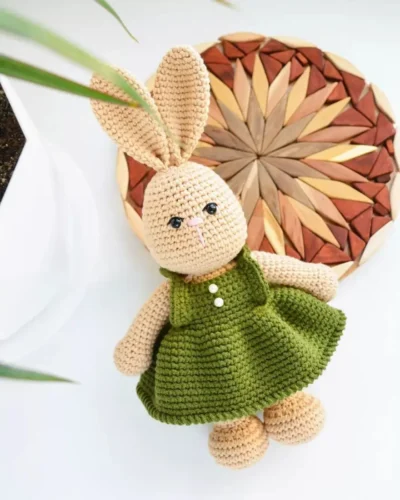
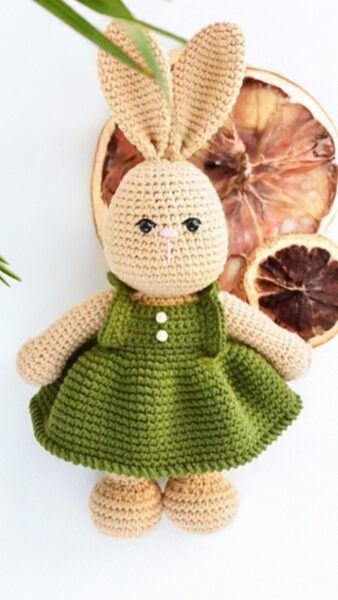
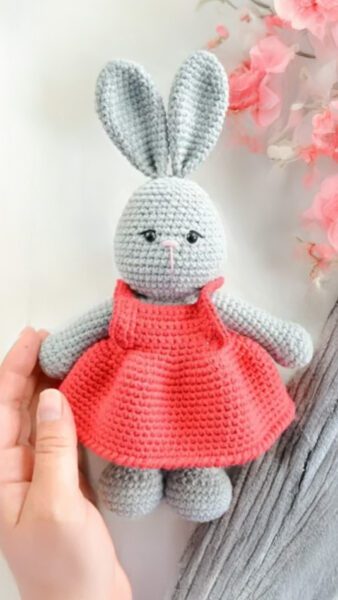
Hello dear amigurumi followers, we add a new one to the free amigurumi pattern. You can always follow us to reach the newest, most popular, most accurate pattern. Here is Free crochet bunny;

Designed and photos by @vitrinatoys
Materials:
- Yarn: YarnArt Jeans (55% cotton, 45% acrylic, 50 g/160 m) two colors
- Hook size: 2.5 mm
- 6 mm safety eyes
- Black and pink floss
- Needle for sewing parts
- Scissors
- Polyester fiberfill
Abbreviations:
R = row
mc = magic circle
ch = chain
sc = single crochet
inc = 2 sc in the next stitch
dec = single crochet 2 stitches together
(12) = number of stitches you should have at the end of the round/row
(…)*6 = repeat whatever is between the brackets the number of times stated
Free amigurumi bunny in dress pattern
Arms (make 2)
R 1: 6 sc in mc (6)
R 2: (inc)*6 (12)
R 3: 12 sc
R 4: (1 sc, inc)*6 (18)
R 5-6: 18 sc (2 rows)
R 7: (1 sc, dec)*6 (12)
Stuff the arm.
R 8-19: 12 sc (12 rows)
R 20: dec, 4 sc, dec, 4 sc (10)
R 21-22: 10 sc (2 rows)
Fold the arm in half and work 5 sc through both edges.
Tail
R 1: 4 sc in mc (4)
R 2: (inc)*4 (8)
R 3: (1 sc, inc)*4 (12)
R 4: (1 sc, dec)*4 (8)
Fold the tail in half and work 4 sc through both edges.

Legs, body and head (one piece)
Legs (make 2)
R 1: 6 sc in mc (6)
R 2: (inc)*6 (12)
R 3: (1 sc, inc)*6 (18)
R 4: (2 sc, inc)* 6 (24)
R 5: (3 sc, inc)*6 (30)
R 6-9: 30 sc (4 rows)
R 10: 5 sc, 10 dec, 5 sc (20)
R 11: 5 sc, 5 dec, 5 sc (15)
R 12-14: 15 sc (3 rows)
R 15: (2 sc, inc)*5 (20)
R 16-17: 20 sc (2 rows)
R 18: 20 sc + 6 sc to shift the row at the first leg / + 17 sc to shift the row at the second leg
Cut off and secure the thread.
Stuff the leg to the end.
Make the second leg the same, but do not cut off the thread in the end.
Make 2 ch and connect to the first leg.
Body
R 1: 20 sc on the first leg, 2 sc on chain, 20 sc on the second leg, 2 sc on chain (44)
R 2-7: 44 sc (6 rows)
R 8: 20 sc, crochet together with tail 4 sc, 20 sc (44)
Stuff the body.
R 9: 10 sc, dec, 21 sc, dec, 9 sc (42)
R 10: 42 sc
R 11: 10 sc, dec, 20 sc, dec, 8 sc (40)
R 12: 40 sc
R 13: 10 sc, dec, 19 sc, dec, 7 sc (38)
R 14: 38 sc
R 15: 10 sc, dec, 18 sc, dec, 6 sc (36)
R 16: 36 sc
R 17: (4 sc, dec)*6 (30)
R 18: 30 sc
R 19: (3 sc, dec)*6 (24)
R 20: 24 sc
R 21: (2 sc, dec)*6 (18)
R 22: 4 sc, crochet together with one arm 5 sc, 4 sc, crochet together with the second arm 5 sc (18)
Head
Continue crochet:
R 1: 18 sc
R 2: (inc)*18 (36)
R 3: (5 sc, inc)*6 (42)
R 4: (6 sc, inc)*6 (48)
R 5-8: 48 sc (4 rows)
R 9: (6 sc, dec)*6 (42)
R 10-11: 42 sc (2 rows)
R 12: (5 sc, dec)*6 (36)
R 13-14: 36 sc (2 rows)
R 15: (4 sc, dec)*6 (30)
R 16-18: 30 sc (3 rows)
Insert the eyes between R 11 and R 12. A distance between the eyes is 3 sc.
Stuff the head.
R 19: (3 sc, dec)*6 (24)
R 20: (2 sc, dec)*6 (18)
R 21: (1 sc, dec)*6 (12)
R 22: (dec)*6 (6)
Cut off the thread, tighten the opening.
Muzzle
Embroider the nose and eyelashes.
Ears (make 2)
R 1: 5 sc in mc (5)
R 2: (inc)*5 (10)
R 3: 10 sc
R 4: (1 sc, inc)*5 (15)
R 5: 15 sc
R 6: (2 sc, inc)*5 (20)
R 7-11: 20 sc (5 rows)
R 12: (8 sc, dec)*2 (18)
R 13: 18 sc
R 14: (7 sc, dec)*2 (16)
R 15: 16 sc
R 16: (6 sc, dec)*2 (14)
R 17: 14 sc
R 18: (5 sc, dec)*2 (12)
R 19: 12 sc
Fold the ear in half and work 6 sc through both edges.
Sew on the ears to the head folding them in half again.

Dress
Start crocheting the dress from the upper part:
R 1: Make 10 ch + 1 turning ch.
Work single crochet in turning rows.
R 2: From the 2nd ch from hook: 10 sc, 1 turning ch
R 3-7: 10 sc, 1 turning ch
Do not cut the yarn, ch 35 and join the chain to the other side of the dress with a sc. Next work in rounds:
R 8: 45 sc
R 9: (2 sc, inc)*15 (60)
R 10: (3 sc, inc)*15 (75)
R 11: (4 sc, inc)*15 (90)
R 12-22: 90 sc (11 rows)
Cut the yarn and secure it.
Shoulder straps
R 1: Crochet along one side of the upper part of the dress – 7 sc, then ch 14 and join the chain to the skirt. The distance between the straps is 10 sc.
Work in turning rows:
R 2: (2 sc, inc)*7 (28)
R 3: (3 sc, inc)*7 (35)
Cut the yarn and secure it.
Repeat the same with the second strap, but here you should start with ch 14 and not with crocheting along the other side of the upper part of the dress.
Crochet along the edge of the skirt with “crab stitch” (reverse single crochet).
Finish Free Crochet Bunny.
You can check out other Amigurumi bunny patterns here. We will continue to share free amigurumi patterns with you. Follow us for more amigurumi patterns. For everything you want to know about amigurumi techniques and amigurumi in general, you can visit The Northalia Crochet Homepage.
More Amigurumi Ideas;


Geri bildirim: Gracie The Kitty Amigurumi Pattern -