
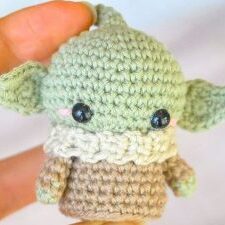
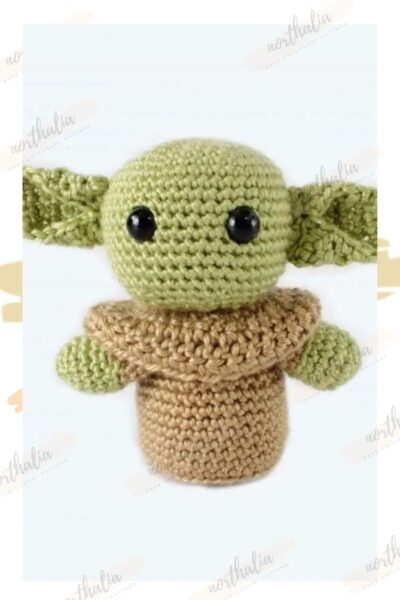
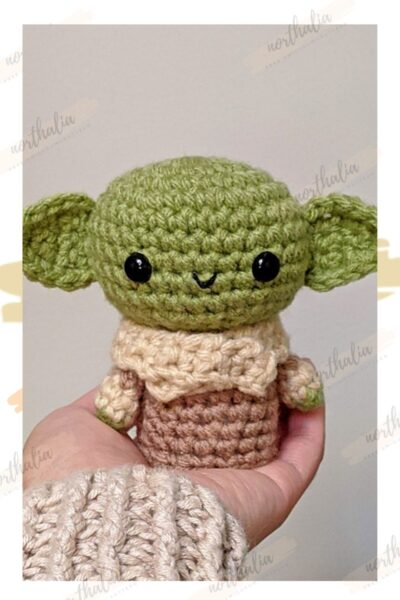
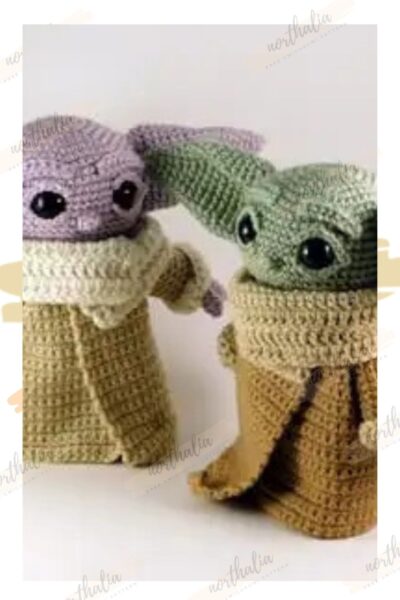
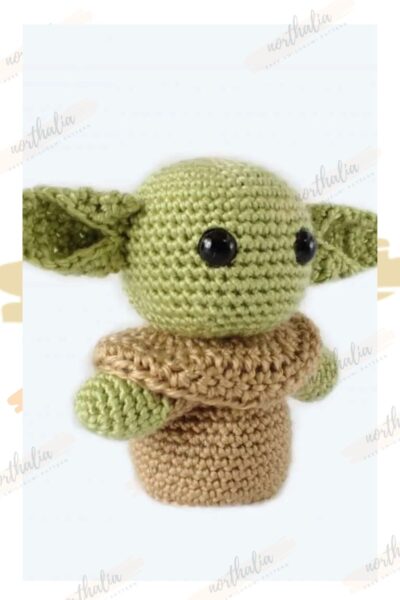
Hello dear amigurumi followers, we add a new one to the free amigurumi pattern. You can always follow us to reach the newest, most popular, most accurate pattern. Here is Crochet Yoda Baby Keychain Pattern;
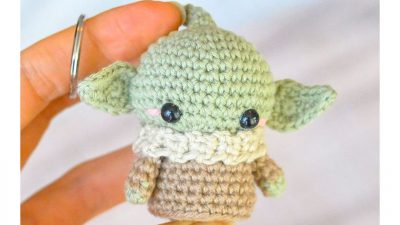
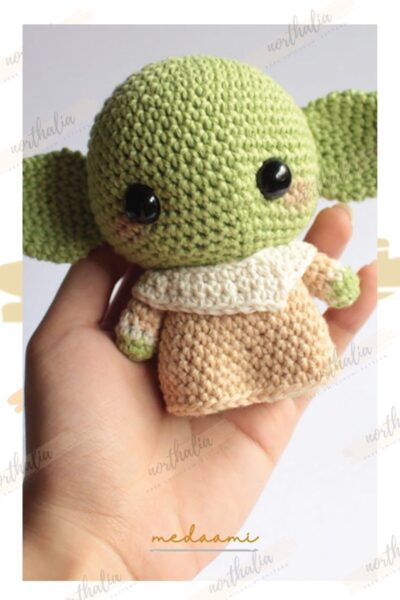
Crochet Yoda Baby Keychain Amigurumi Free Pattern
Designer: emsacrochet
Abbreviations
Rnd: Round
MR: Magic ring
Sc: Single crochet
Ch: Chain
Inc: Increase
Dec: Decrease
Slst: Slip stitch
Head
Rnd 1. 6 sc in MR (6)
Rnd 2. 6 inc (12)
Rnd 3. (1sc,inc)*6 (18)
Rnd 4. (2sc,inc)*6 (24)
Rnd 5. (3sc,inc)*6 (30)
Rnd 6. 30 sc
Rnd 7. (9sc,inc)*3 (33)
Rnd 8. 33 sc
Rnd 9. (10sc,inc)*3 (36)
Rnd 10-11. 2 rounds with sc 36
Rnd 12. (4sc,dec)*6 (30)
Rnd 13. (3sc,dec)*6 (24)
Rnd 14. (2sc,dec)*6 (18)
Stuff.
Rnd 15. (1sc,dec)*6 (12)
Rnd 16. 6 dec (6)
End with a sl st and fasten off.
6 mm eyes between rnd 10 and 11 with 6 st apart.
Body
Rnd 1. 6 sc in MR (6)
Rnd 2. 6 inc (12)
Rnd 3. (1sc,inc)*6 (18)
Rnd 4. (5sc,inc)*3 (21)
Rnd 5-7. 3 rounds with sc (21)
Rnd 8. (5sc,dec)*3 (18)
Rnd 9-10. 2 rounds with sc (18)
End with a slst and leave a long tail for sewing, stuff.
Coat
This side will sit against the head, so save a long tail for sewing.
Ch 23, start in the very first ch.
Rnd 1-3. 3 rounds with sc (23)
Rnd 4. inc, 11 sc, inc, 10 sc (25)
Rnd 5-6. 2 rounds with sc (25)
End with a sl st, fasten off.
Ears (Make 2)
Rnd 1. 6 sc in MR (6)
Rnd 2. Ch 5 and turn, start in the third ch and make sc in the rest of the 3 ch, keep crochet around the circle: 1 sc, inc*4, 1sc, 3 sc on the other side of the ch (16)
End with a sl st and leave a tail for sewing.

Arms (Make 2)
Start with green.
Rnd 1. 6 sc in MR (6)
Change to light brown.
Rnd 2-5. 4 rounds with sc (6)
End with a sl st and leave a tail for sewing.
Scarf
Ch 3, start in the second ch from your hook.
Rnd 1-27. 2 sc, ch 1 and turn.
End with a sl st and leave a tail for sewing.
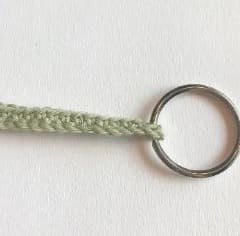
Keyring
Ch an optional amount, start in the fourth ch from your hook and place the keyring there, sc in each st of the ch

Assembly
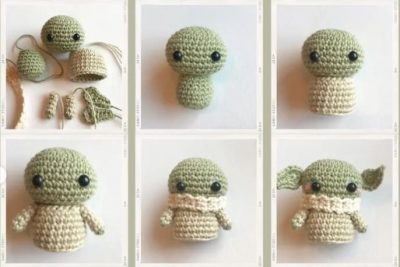
Finish Crochet Yoda Baby Keychain.
More Amigurumi Ideas;


You really make it appear really easy along with your presentation however I to find this topic to be really something that
I think I’d by no means understand. It seems too complicated and
very vast for me. I am looking ahead on your next submit, I
will attempt to get the grasp of it!