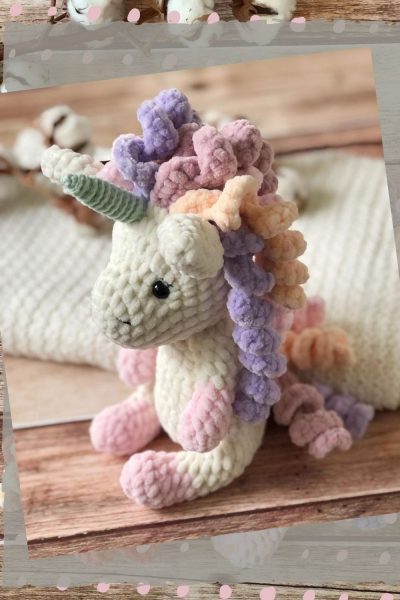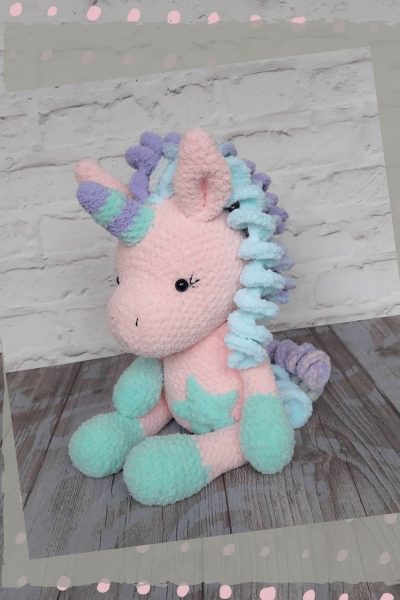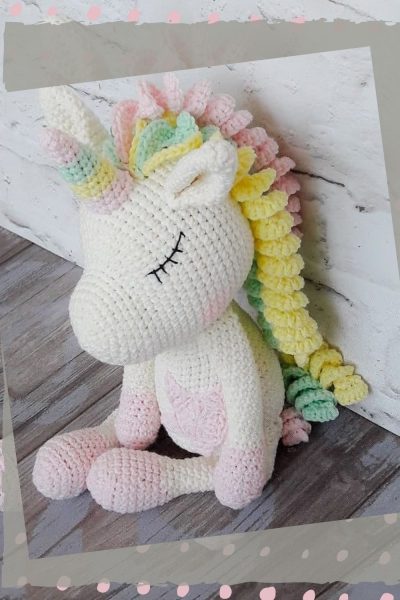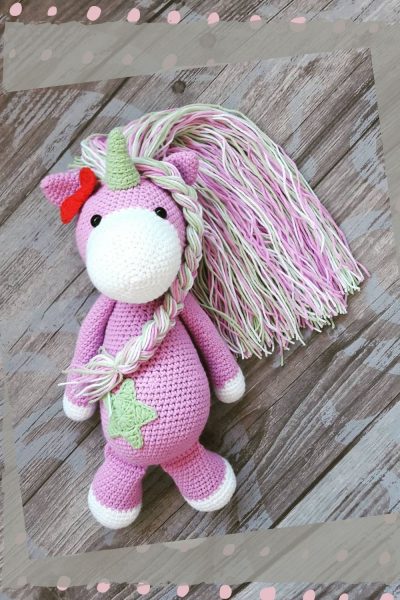
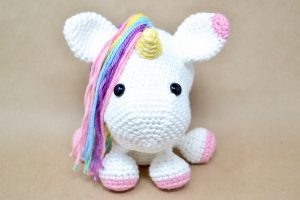
Hello dear amigurumi followers, we add a new one to the free amigurumi pattern. You can always follow us to reach the newest, most popular, most accurate pattern. Here is Amigurumi Unicorn Pattern;
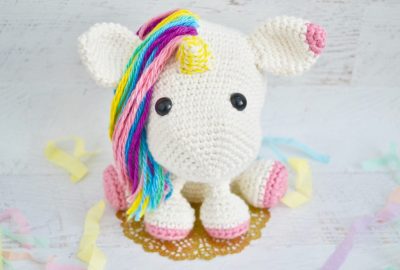
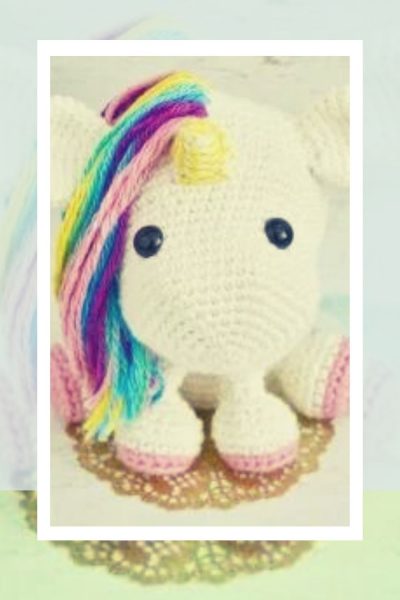
Free Amigurumi Unicorn Pattern
Unicorn Pattern Example
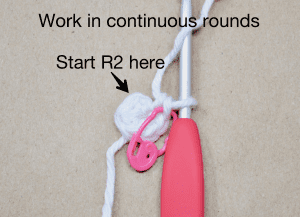
6 sc into a Magic Circle {6 sts}
R1 starts with 6 single crochet in a magic circle
Alternate way to begin: chain 2, sc 6 times in 2nd chain from hook {6 sts}
(inc, sc in next 2 sts) 2 times {8 sts}
(2 single crochets into a stitch, then single crochet in each of the next 2 stitches) – repeat that sequence a total of 2 times for a total of 8 stitches
(dec, sc in next 2 sts) 6 times {18 sts}
(join 2 single crochets into 1, and then single crochet in next 2 stitches) – repeat that sequence a total of 6 times for a total of 18 stitches
If a round states to work in the back loop only, go back to working through both loops after that Round, unless specified.
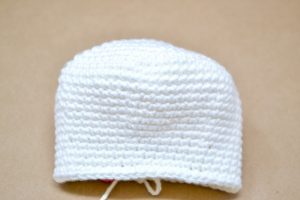
HEAD
- Using Color White
- R1: 6 sc into a magic circle {6 sts}
- R2: (inc) 6 times {12 sts}
- R3: (inc, sc in next st) 6 times {18 sts}
- R4: (inc, sc in next 2 sts) 6 times {24 sts}
- R5: (inc, sc in next 3 sts) 6 times {30 sts}
- R6: (inc, sc in next 4 sts) 6 times {36 sts}
- R7: (inc, sc in next 5 sts) 6 times {42 sts}
- R8: (inc, sc in next 6 sts) 6 times {48 sts}
- R9: (inc, sc in next 7 sts) 6 times {54 sts}
- R10: (inc, sc in next 8 sts) 6 times {60 sts}
- R11-13: sc in next 60 sts {60 sts}
- R14: (dec, sc in next 8 sts) 6 times {54 sts}
- R15-16: sc in next 54 sts {54 sts}
- R17: (dec, sc in next 7 sts) 6 times {48 sts}
- R18-19: sc in next 48 sts {48 sts}
- R20: (dec, sc in next 6 sts) 6 times {42 sts}(Optional) Mark R23 with a stitch marker – this is where you’ll place the eyes later in the pattern.
- R21-23: sc in next 42 sts {42 sts}
- R24: (inc, sc in next 6 sts) 6 times {48 sts}
- R25: (inc, sc in next 7 sts) 6 times {54 sts}
- R26: (dec, sc in next 7 sts) 6 times {48 sts}
- R27: (dec, sc in next 6 sts) 6 times {42 sts}
- R28: sc in next 42 sts {42 sts}
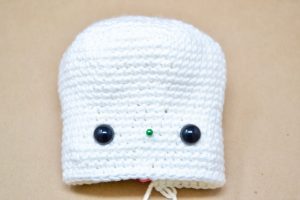
- Place 12mm safety eyes between R23 and R24, leaving 8 stitches between the eyes. Secure the eyes and begin to stuff the head, continue as you crochet.
- R29: (dec, sc in next 5 sts) 6 times {36 sts}
- R30: (dec, sc in next 4 sts) 6 times {30 sts}
- R31: (dec, sc in next 3 sts) 6 times {24 sts}
- R32: (dec, sc in next 2 sts) 6 times {18 sts}
- R33: (dec, sc in next st) 6 times (12 sts}
- R34: (dec) 6 times {6 sts}
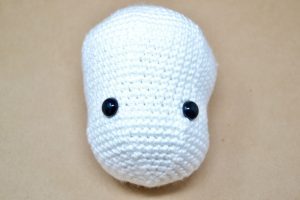
- Fasten off and leave a long piece of yarn to sew the head shut. Weave the rest of the yarn into the head and set aside until assembly.
EARS
- Make 2
- Using color Pink
- R1: 3 sc into a magic circle {3 sts}
- R2: (inc) 3 times {6 sts}Increasing by three stitches can be tedious. Make sure to turn your work the right way, it will want to turn in the opposite way.
- R3: (inc, sc in next st) 3 times {9 sts}
- Change to Color White
- R4: (inc, sc in next 2 sts) 3 times {12 sts}
- R5: (inc, sc in next 3 sts) 3 times {15 sts}
- R6: (inc, sc in next 4 sts) 3 times {18 sts}
- R7: (inc, sc in next 5 sts) 3 times {21 sts}
- R8: (inc, sc in next 6 sts) 3 times {24 sts}
- R9: (dec, sc in next 6 sts) 3 times {21 sts}
- R10: (dec, sc in next 5 sts) 3 times {18 sts}
- R11: (dec, sc in next 4 sts) 3 times {15 sts}
- R12: (dec, sc in next 3 sts) 3 times {12 sts}
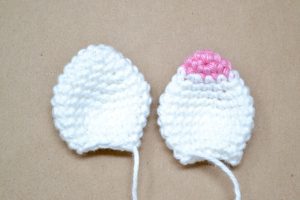
- No stuffing needed. Fasten off and leave a long tail. Flatten the ear, sew shut and set aside.
- For the second ear, repeat R1-R12 using white yarn only.
- No stuffing needed. Fasten off and leave a long tail. Flatten the ear, sew shut and set aside.
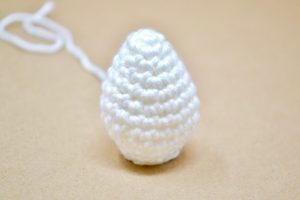
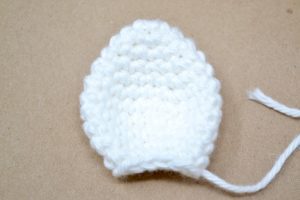
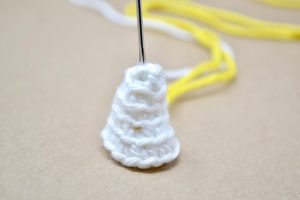
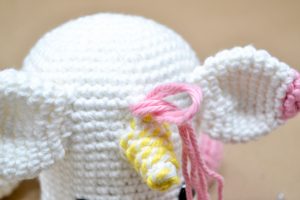
HORN
- Using color White
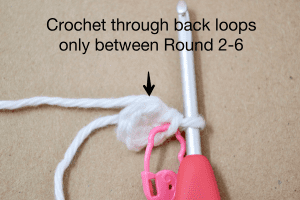
- Please Note: R2-R6 are crocheted through the back loops only.
- R1: 4 sc into a magic circle {4 sts}
- R2: (inc, sc in next 3 sts) {5 sts}
- R3: (inc, sc in next 4 sts) {6 sts}
- R4: (inc, sc in next 2 sts) 2 times {8 sts}
- R5: (inc, sc in next 3 sts) 2 times {10 sts}
- R6: (inc, sc in next 4 sts) 2 times {12 sts}
- Fasten off and leave a long tail.
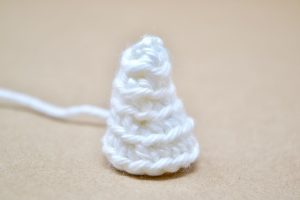
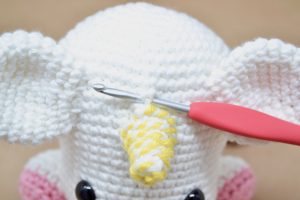
- Adding Color to the Horn
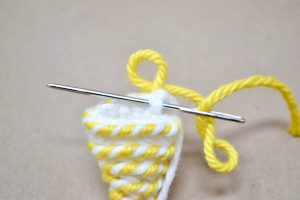
- Cut a 20 inch piece of yellow yarn and make a knot on one end. Thread the yarn through a darning needle.
- Insert the needle through the middle of the horn (from inside -out).
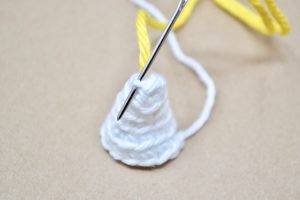
- Place your needle through the first back loop of R2.
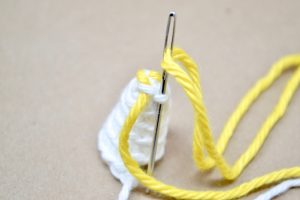
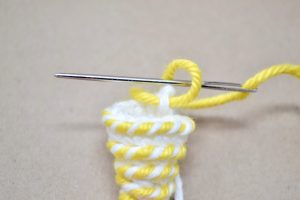
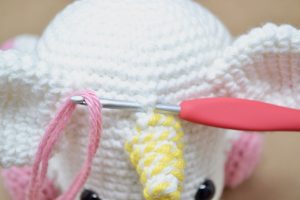
- Continue to weave your needle through each of the back loops
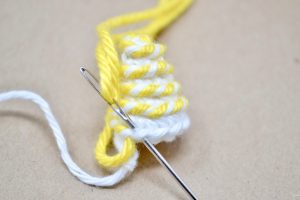
- Continue around…
- Until you’ve reached the end.Make a knot on the inside of the horn to secure. Step-by-step instructions below.
- Grab a stitch on the inside of the horn. Pull the yarn through – making a loop.
- Pull your needle through the loop.
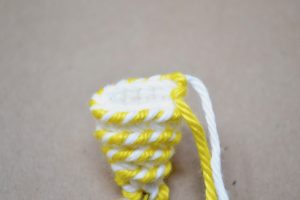
- And tighten to make a knot.
- No stuffing needed. Set aside until assembly.
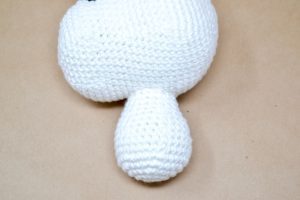
BODY
- Using color White
- R1: 6 sc into a magic circle {6 sts}
- R2: (inc) 6 times {12 sts}
- R3: (inc, sc in next st) 6 times {18 sts}
- R4: (inc, sc in next 2 sts) 6 times {24 sts}
- R5: (inc, sc in next 3 sts) 6 times {30 sts}
- R6: (inc, sc in next 4 sts) 6 times {36 sts}
- R7: (dec, sc in next 4 sts) 6 times {30 sts}
- R8-9: sc in next 30 sts {30 sts}
- R10: (dec, sc in next 3 sts) 6 times {24 sts}
- R11-12: sc in next 24 sts {24 sts}
- R13: (dec, sc in next 2 sts) 6 times {18 sts}
- Start stuffing the body and continue as you crochet.
- R14-15: sc in next 18 sts {18 sts}
- R16: (dec, sc in next 4 sts) 3 times {15 sts}
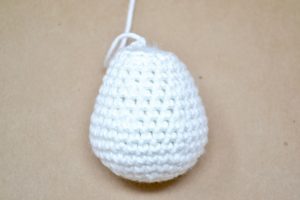
- Fasten off and leave a long tail. Set aside until assembly.
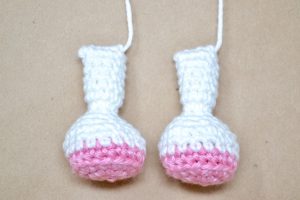
FRONT LEGS
- Make 2
- Using Color Pink
- R1: 6 sc into a magic circle {6 sts}
- R2: (inc) 6 times {12 sts}
- R3: (inc, sc in next st) 6 times {18 sts}

- R4: sc in the back loop only in the next 18 sts {18 sts}Go back to crocheting through both loops.
- Change to Color White
- R5: sc in next 18 sts {18 sts}
- R6: (inc, sc in next 2 sts) 6 times {24 sts}
- R7: (dec, sc in next 2 sts) 6 times {18 sts}
- R8: (dec, sc in next st) 6 times (12 sts}
- R9: sc in next 12 sts {12 sts}
- Stuff the foot with a bit of stuffing and continue as you crochet.
- R10: (dec) 6 times {6 sts}
- R11: sc in next st, inc in next 3 sts, sc in next 2 sts {9 sts}
- R12-17: sc in next 9 sts {9 sts}
- Fasten off and leave a long tail. Sew each foot shut and set aside until assembly
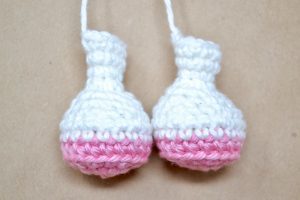
BACK FEET
- Make 2
- Using Color Pink
- R1: 6 sc into a magic circle {6 sts}
- R2: (inc) 6 times {12 sts}
- R3: (inc, sc in next st) 6 times {18 sts}
- R4: sc in the back loop only in next 18 sts {18 sts}Go back to crocheting through both loops.
- Change to Color White
- R5: sc in next 18 sts {18 sts}
- R6: (inc, sc in next 2 sts) 6 times {24 sts}
- R7: (dec, sc in next 2 sts) 6 times {18 sts}
- R8: (dec, sc in next st) 6 times (12 sts}
- R9: sc in next 12 sts {12 sts}
- Stuff the foot with a bit of stuffing. Don’t stuff anymore. Continue crocheting.
- R10: (dec) 6 times {6 sts}
- R11: sc in next st, inc in next 3 sts, sc in next 2 sts {9 sts}
- R12-13: sc in the next 9 sts {9 sts}
- Fasten off and leave a long tail. Set aside until assembly.
ASSEMBLY
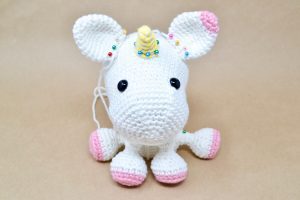
- I recommend pinning the parts together before sewing the animal together. This will give you an idea of where you’d like the parts to go before assembly.
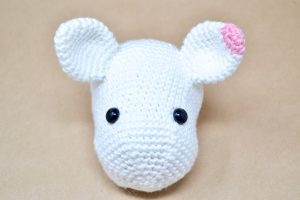
- Attach the ears between R11 and R15, one on each side of the head, at a slight diagonal.
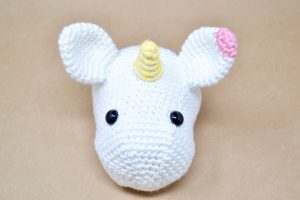
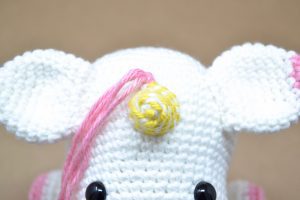
- Attach the horn in the middle of the eyes, between R13 and R18.
- Attach the body to the head, between R14 and R18.The front of the head will be slanted down a bit. Make sure to stuff the body really well, this will help with the stability of the head. You can also sew around the body twice for extra security.

- Attach the front legs underneath the head, one on each side of the body.

- Attach the back legs between R6 and 9 of the body, on each side of the body.
- Weave in all the excess pieces of yarn into the body. Please be aware that amigurumi contains small pieces and can be dangerous to children. If you’re selling this stuffed ami, please place a warning and also state that safety eyes are not recommended for anyone under the age of 3.
HAIR
- Cut 4 (15 inch) pieces of pink, purple, blue, green, and yellow yarn.
- Starting above the horn, pick a stitch in the middle and insert your hook.
- Place 2 pieces of yarn onto the hook.

- Pull the yarn through the stitch stopping halfway. You’ll have a large loop on one side and loose yarn on the other.
- Insert the loose end of the yarn through the loop.
- Tighten the yarn at the base of the head.

- Keep add sections of hair by moving down a stitch.
- When you have all the hair attached, trim if needed.

- If you like the look of crimpy hair then separate each strand of yarn with a darning needle.

- Crimpy hair look.
- (Optional) Add a piece at the back of the body to make a tail – braid it and add a bow.
Finish Amigurumi Unicorn Pattern.
More Amigurumi Ideas;