Hello dear Amigurumi Followers,
We add a new one to the free amigurumi patterns we have created for you. You can always get the most popular amigurumi patterns and the most preferred amigurumi crochet patterns on our site for free. Main crochets, amigurumi gazelles, amigurumi bears, amigurumi polar bears, amigurumi pandas, amigurumi penguins, amigurumi giraffes, amigurumi llama, amigurumi pigs, amigurumi rabbit, amigurumi clowns, amigurumi baby lambs, amigurumi lambs, amigurumi bees, amigurumi lambs dinosaurs, amigurumi elephants, amigurumi hippos, amigurumi monkeys, amigurumi cats, amigurumi dogs and more…
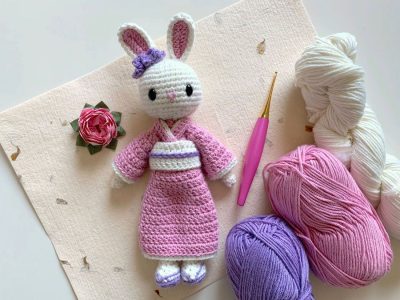
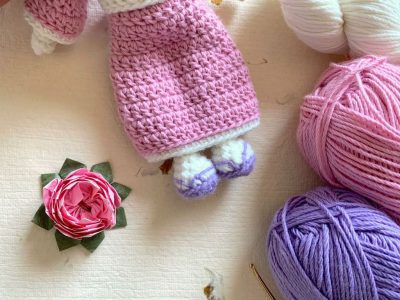
Our new free amigurumi crochet pattern Sakura Kimono Bunny .
Here is our pattern;
SUPPLIES
Yarn:
- Worsted Weight # 4 Yarn in 3 Colors –
Notions:
3.25 mm crochet hook & 4 mm crochet hook
Scissors
Tapestry Needle
Oval plastic safety eyes (size: 8x11mm)
Fiberfill stuffing
PATTERN DETAILS
Measurements:
Height: 11 inches/28 centimeters
Skill Level
Intermediate
Gauge
Gauge is not crucial for this project.
Crochet Stitch Abbreviations
FO: Fasten off
MR: Magic Ring
Ch: Chain
Sl st: Slip Stitch
Sc: Single Crochet
Dc: Double Crochet
Fsc: Foundation Single Crochet
Fdc: Foundation Double Crochet
Inc: Increase
Dec: Decrease
Dc-dec: Dc Decrease
Dc-inc: Dc Increase
BLO: Back Loop Only
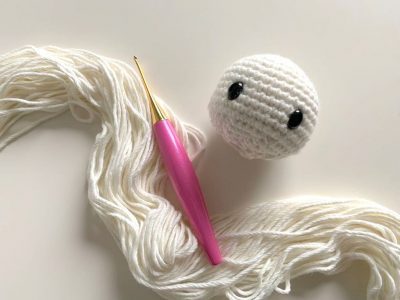
HEAD
Use white yarn.
R1: In MR, sc 6. (6 sts)
R2: Inc around. (12 sts)
R3: (Sc, inc) x 6. (18 sts)
R4: (Sc 2, inc) x 6. (24 sts)
R5: (Sc 3, inc) x 6. (30 sts)
R6: (Sc 4, inc) x 6. (36 sts)
R7-R13: Sc around. (36 sts)
R14: (Sc 4, dec) x 6. (30 sts)
R15: (Sc 3, dec) x 6. (24 sts)
Insert eyes. I used 8x11mm oval eyes between R10-R11, 7 sts apart.
R16: (Sc 2, dec) x 6. (18 sts)
R17: Dec around. (9 sts)
FO. No need to leave a long tail.
EARS (x2)
Part 1: INNER EARS | Use pink yarn.
Ch 10. Hdc in 3rd ch from hook. Hdc across next 6 ch. Insert 5 hdc in last ch, bringing you around to other side of the ch with a row of unworked loops. Hdc across the 7 sts on this opposite side.
FO, no need for a long tail.
Part 2: OUTER EARS | Use white yarn.
Repeat instructions for inner ear, but do not FO. Instead, place pink piece in front of white piece. Ch 1 and sc around in both loops of the pink and white parts to stitch them together. Go around the sides and tops of the ear, skipping the bottom edge of the ear.
FO with a long tail for sewing later.
FLOWERS (x2)
Use purple yarn and the 4mm hook.
R1: In MR, (ch 5, sl st in ring) x 5.
FO with a tail for sewing later.
ARMS (x2)
Use white yarn.
R1: In MR, sc 6. (6 sts)
R2-R14: Sc around. (6 sts)
FO. No need to leave a long tail.
SLEEVES (x2)
Start with dress-colored yarn (pink).
R1: In MR, ch 3 and insert 8 dc. *Join with a sl st to the first dc. (8 sts)
R2: Ch 3. (Dc 3, dc-inc) x 2. *Join. (10 sts)
R3: Ch 3. (Dc 4, dc-inc) x 2. *Join. (12 sts)
R4: Ch 3. (Dc 5, dc-inc) x 2. *Join. (14 sts)
R5: Ch 3. (Dc 6, dc-inc) x 2. *Join. (16 sts)
R6: Ch 3. (Dc 7, dc-inc) x 2. *Join. (18 sts)
Switch to sleeve-lining yarn (white).
R7: Ch 1, sc around in BLO. *Join. (18 sts)
FO and weave in the ends.
NECK COLLAR
Start with dress-colored yarn (pink).
R1: Fsc 25. (Or, ch 26, sc in 2nd ch from hook, sc across.)
Switch to lining-colored yarn (white).
R2: In BLO, sl st across.
FO with a tail for sewing later.
OBI SASH (BELT)
Use white yarn.
R1: Fdc 20, or however many long you’d like the waist ribbon to be. (20 sts)
R2: Ch 3, turn. Dc across. (20 sts)
FO and weave in the ends.
With pink yarn, leave a yarn tail and attach yarn between R1-R2. Surface sl st across. Leave a yarn tail for tying to the starting yarn tail later.
LEGS (x2)
Note: Stuff the legs bit by bit as you work.
Start with shoe-colored yarn (purple).
R1: In MR, sc 6. (6 sts)
R2: Inc around. (12 sts)
R3: Sc 4, inc 4, sc 4. (16 sts)
Switch to white yarn. FO with a long tail for the shoe-colored yarn to use for sewing sandal straps later.
R4: In BLO, sc 6, dec 2, sc 6. (14 sts)
R5: Sc 5, dec 2, sc 5. (12 sts)
R6: Sc 4, dec 2, sc 4. (10 sts)
At this point, sew the sandal straps to the sock using the shoe-colored yarn.
R7: Sc 3, dec 2, sc 3. (8 sts)
R8-R21: Sc around. (8 sts)
FO. No need to leave a long tail.
BODY
Pick up the two completed legs. Insert hook into side of one leg. Attach underwear-colored yarn (white).
R1 [Joining Round]: Ch 1, sc 5. Ch 3, and then join to a stitch to the side of the second leg with a sc. Sc 8 around the second leg. Insert a sc in each of the 3 ch. Sc in remaining 3 sts of the first leg. Join with a sl st to the first sc.
R2: Sc around. Note: You will be working a sc in each of the 3 ch between the legs. (22 sts)
R3-R4: Sc around. (22 sts)
Switch to dress-colored yarn (pink).
R5: Sc around. (22 sts)
R6: Sc around in BLO. (22 sts)
R7-R8: Sc around. (22 sts)
R9: (Sc 9, dec) x 2. (20 sts)
R10: (Sc 8, dec) x 2. (18 sts)
R11: (Sc 7, dec) x 2. (16 sts)
R12: (Sc 6, dec) x 2. (14 sts)
R13: (Sc 5, dec) x 2. (12 sts)
R14: (Sc 4, dec) x 2. (10 sts)
R15: Sc 8, dec. (9 sts)
FO with a long tail for sewing later.
DRESS SKIRT
Note: The dress skirt is crocheted directly onto the body. No sewing is needed for this part.
Pick up the completed body. Place it face-down with the neck opening towards you. Attach dress-colored yarn (pink) to the unworked back loop created in R6 of the body.
R1: Ch 3, (dc 10, dc-inc). *Join with a sl st to the first dc. (24 sts)
R2: Ch 3, (dc 7, dc-inc) x 3. *Join. (27 sts)
R3: Ch 3, (dc 8, dc-inc) x 3. *Join. (30 sts)
R4: Ch 3, (dc 14, dc-inc) x 2. *Join. (32 sts)
R5: Ch 3, dc around. *Join. (32 sts)
R6: Ch 3, (dc 15, dc-inc) x 2. *Join. (34 sts)
R7: Ch 3, dc around. *Join. (34 sts)
R8: Ch 3, (dc 16, dc-inc) x 2. *Join. (36 sts)
R9: Ch 3, dc around. *Join. (36 sts)
Switch to lining-colored yarn (white).
R10: Ch 1, sc around in BLO. *Join. (36 sts)
FO and weave in the ends.
FINISHING & ASSEMBLY
- Using pink yarn, sew a nose and mouth to the head.
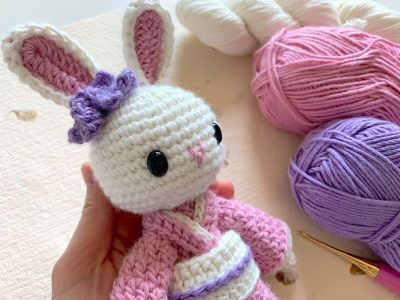
- Pinch the bottoms of the ears and sew them to the head.
- Insert arms into the sleeves. Then, sew them to the sides of the body.
- Sew flower(s) to the head.
- Make sure both the body and head are firmly stuffed, then sew them together.
- Place neck collar around doll’s neck, then sew it securely.
- Wrap the obi sash around the doll’s waist and tie the ends behind the back.
More Amigurumi Ideas;