Hello dear Amigurumi Followers,
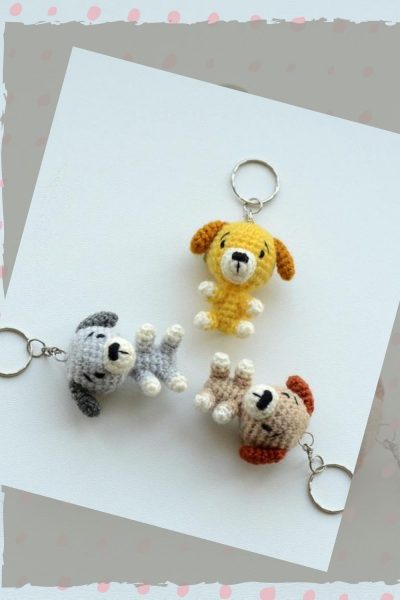
We add a new one to the free amigurumi patterns we have created for you. You can always get the most popular amigurumi patterns and the most preferred amigurumi crochet patterns on our site for free. Main crochets, amigurumi gazelles, amigurumi bears, amigurumi polar bears, amigurumi pandas, amigurumi penguins, amigurumi giraffes, amigurumi llama, amigurumi pigs, amigurumi rabbit, amigurumi clowns, amigurumi baby lambs, amigurumi lambs, amigurumi bees, amigurumi lambs dinosaurs, amigurumi elephants, amigurumi hippos, amigurumi monkeys, amigurumi cats, amigurumi dogs and more…
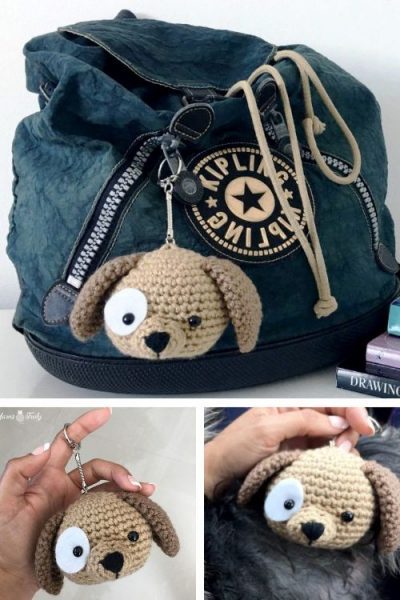
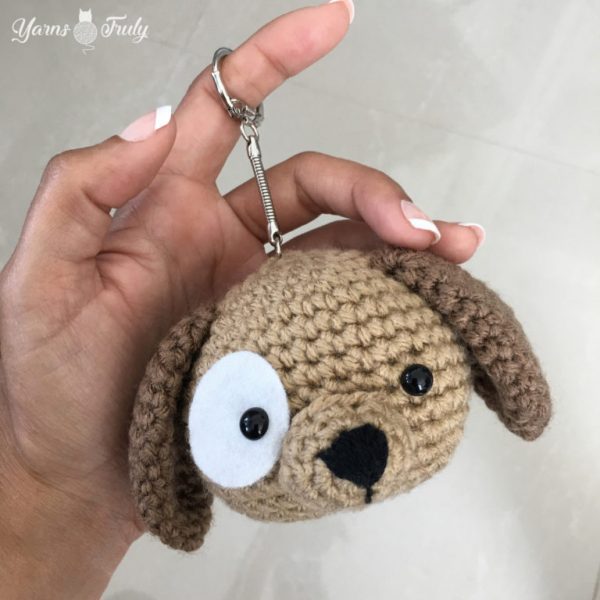
Our new free amigurumi crochet pattern Puppy Keychain.
Here is our pattern;
Materials
Hook 4.5mm
Red Heart Super Saver Yarn in Caffe Latte and Warm Brown
Black embroidery thread
Pair of 7mm safety eyes
An oval shape of white felt about 1-1 / 4 inch long by 1 inch wide
Poly-fil fiber
Yarn needle and scissors
Fabric glue
Keychain ring
Head with Caffe Latte:
Rd1: 6 SC in Magic Ring
Rd2: inc in each stitch 6 around (12)
Rd3: (inc in next stitch, SC in next stitch) repeat 6 times (18)
Rd4: (inc in next stitch, SC in next 2 stitches) repeat 6 times (24)
Rd5: (inc in next stitch, SC in next 3 stitches) repeat 6 times (30)
Rd6: (inc in next stitch, SC in next 4 stitches) repeat 6 times (36)
Rd7 to 14: SC in all 36 stitches
Rd15: (dec2tog, SC in next 4 stitches) repeat 6 times (30)
Rd16: (dec2tog, SC in next 3 stitches) repeat 6 times (24)
Take the oval shape of white felt and snip a tiny hole close, but not too close, to the edge (Refer to pic). Insert one safety eye through it and secure it to the head between rounds 11 and 12. Secure the other eye 6 stitches apart from the first. We will glue the felt down when the head is finished. Stuff with poly-fil fiber.
Rd17: (dec2tog, SC in next 2 stitches) repeat 6 times (18)
Rd18: (dec2tog, SC in next stitch) repeat 6 times (12)
Stuff more poly-fil fiber as needed.
Rd19: dec2tog 6 times (6)
Sl St and fasten off leaving a long tail. Using your yarn needle, sew the remaining stitches closed. Glue the felt to the head.
Ears with Warm Brown:
Rd1: 4 SC in Magic Ring
Rd2: inc in each stitch around (8)
Rd3: (inc in next stitch, SC in next stitch) repeat 4 times (12)
Rd4: (inc in next stitch, SC in next 2 stitches) repeat 4 times (16)
Rd5: SC in all 16 stitches
Rd6: (inc in next stitch, SC in next 3 stitches) repeat 4 times (20)
Rd7 to 9: SC in all 20 stitches around
Rd10: (dec2tog, SC in next 3 stitches) repeat 4 times (16)
Rd11: SC in all 16 stitches around
Rd12: (dec2tog, SC in next 2 stitches) repeat 4 times (12)
Rd13: SC in all 12 stitches around
Sl St and fasten off leaving a long tail.
Sew an ear to each side of the head between rounds 4 and 5.
Snout with Warm Brown:
Rd1: 4 SC in Magic Ring
Rd2: inc in each stitch around (8)
Rd3: (inc in next stitch, SC in next stitch) repeat 4 times (12)
Rd4: SC in all 12 stitches around.
Sl St and fasten off leaving a long tail.
Take your needle and black embroidery thread. Coming from the back of the snout and out the center of the magic ring, take the thread up to the second round at a slight angle and out again through the center. Now go to the other side with the thread making a V shape. Repeat going side to side covering the space between the V.When you’re done, come out through the center one last time and now take the thread down in a straight line to the very last round. Fasten off in the back of the snout.
Sew the snout to the head between the eyes and one round lower (the edge of the snout should be slightly touching the edge of the white felt). Stuff with a bit of poly-fil fiber before you completely attach it.
Attach the keychain ring to the top of the head and you’re done!
Thank you so much for following along and I hope you’ve enjoyed it!
More Amigurumi Ideas;